Record a lecture with Kaltura in Canvas
Last changed: 03 December 2024
To record new media, you can use the tool Kaltura Capture which can record various sources such as monitor, webcam and audio.
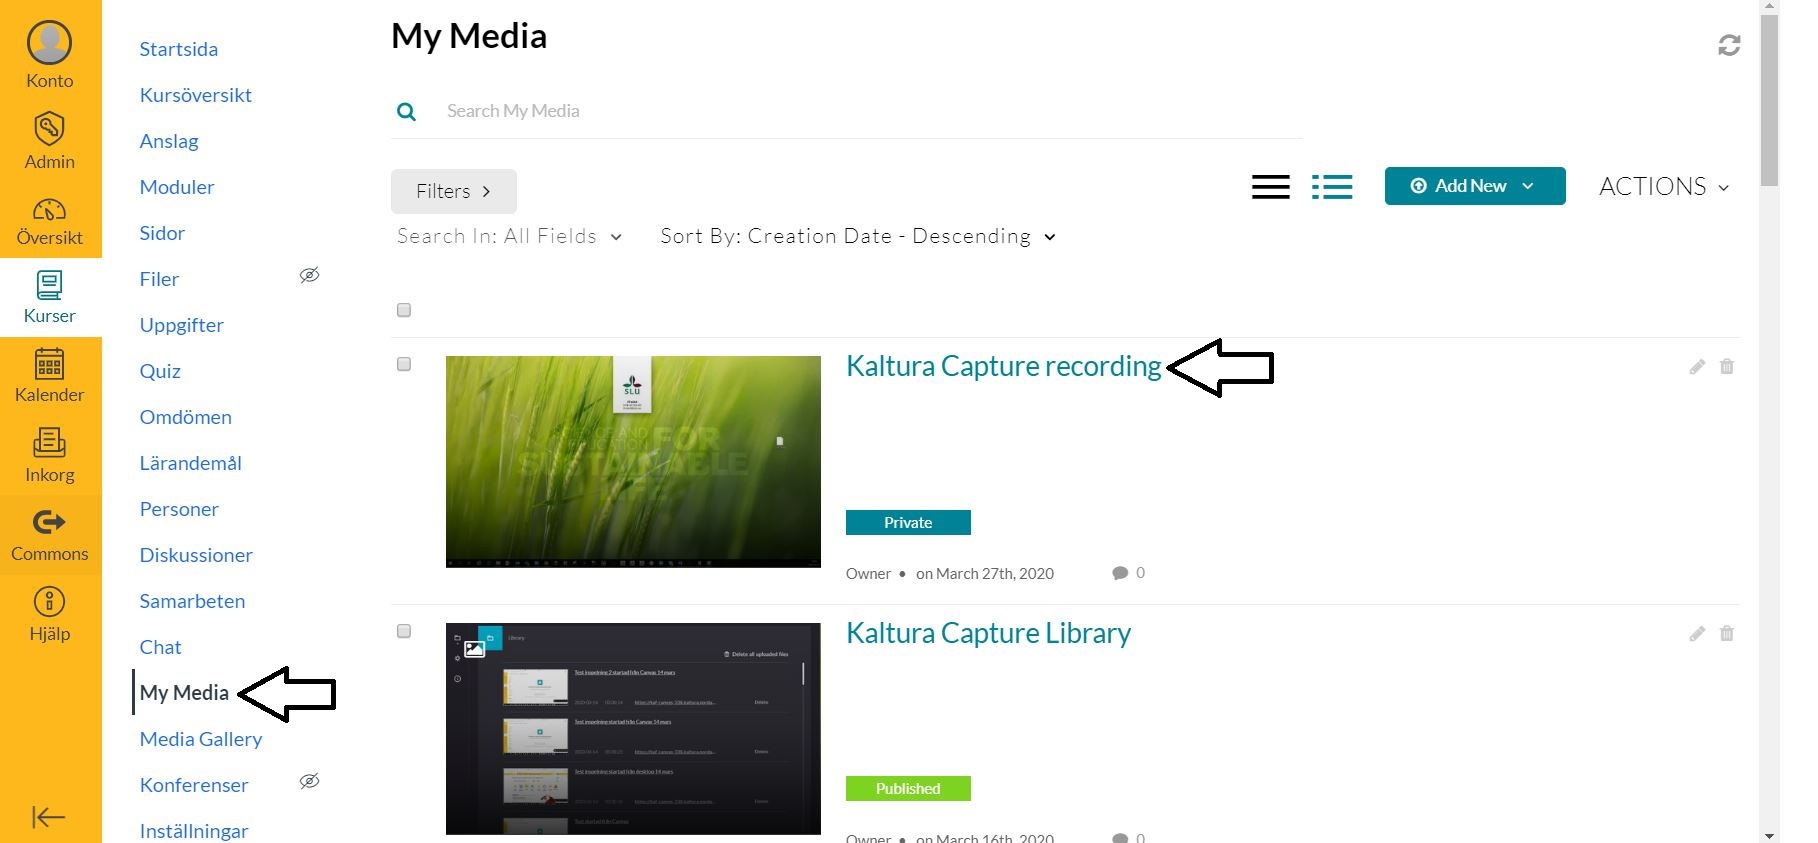
Launch the tool in Canvas via My Media > Add New > Kaltura Capture.
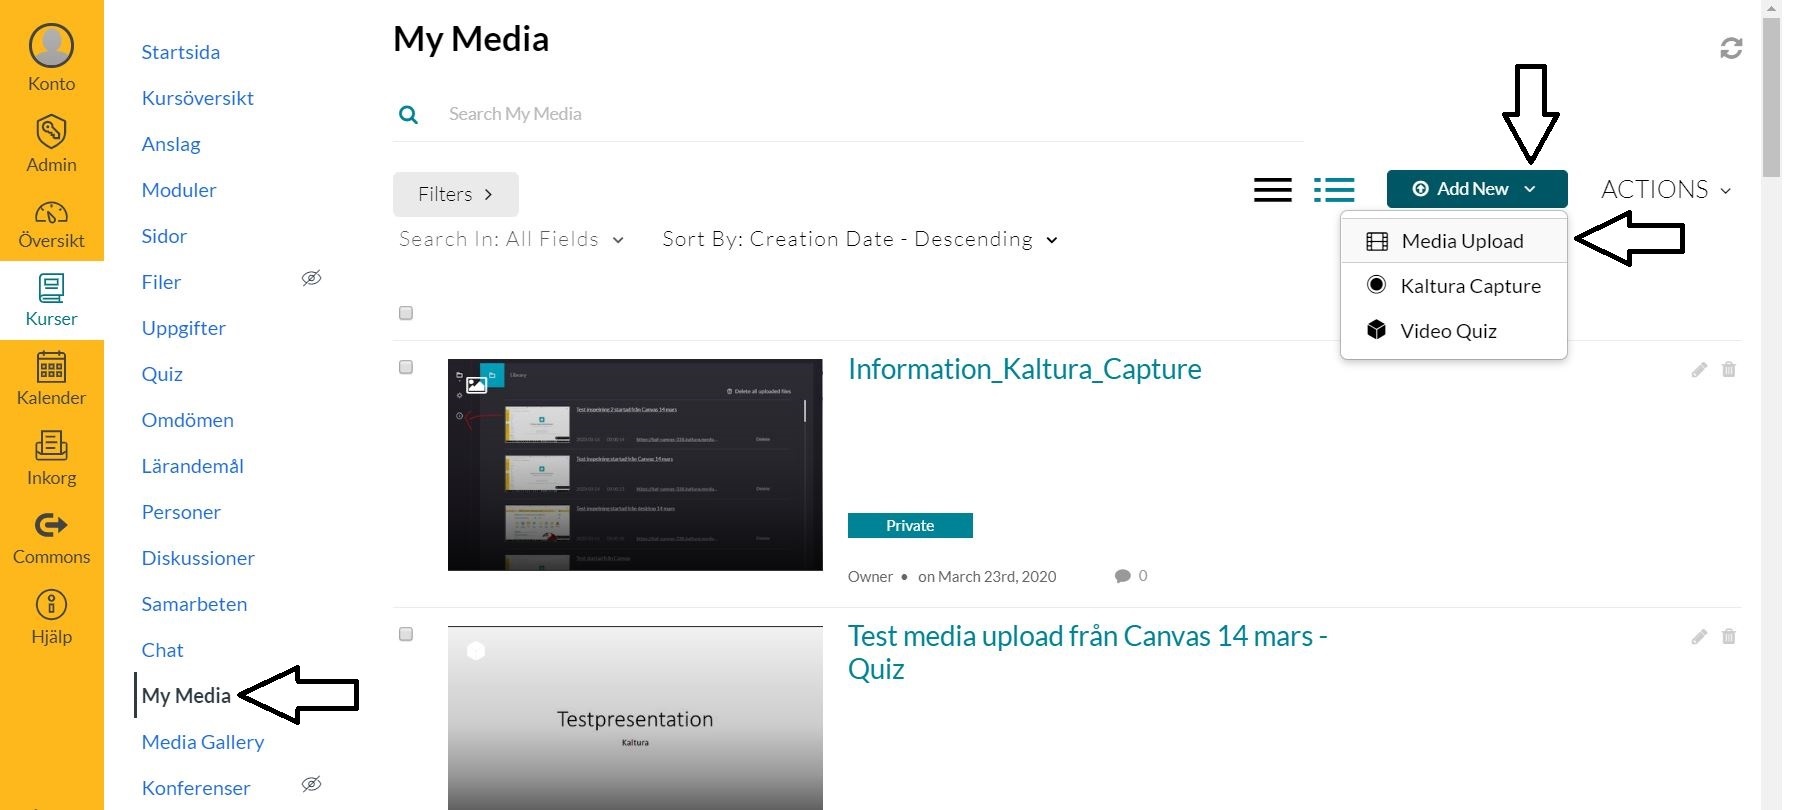
(The image shows how to launch My Media > Add New > Kaltura Capture.)
The first time, you need to download and install the tool on your computer. Then you can launch the tool directly from your computer without logging in to Canvas.
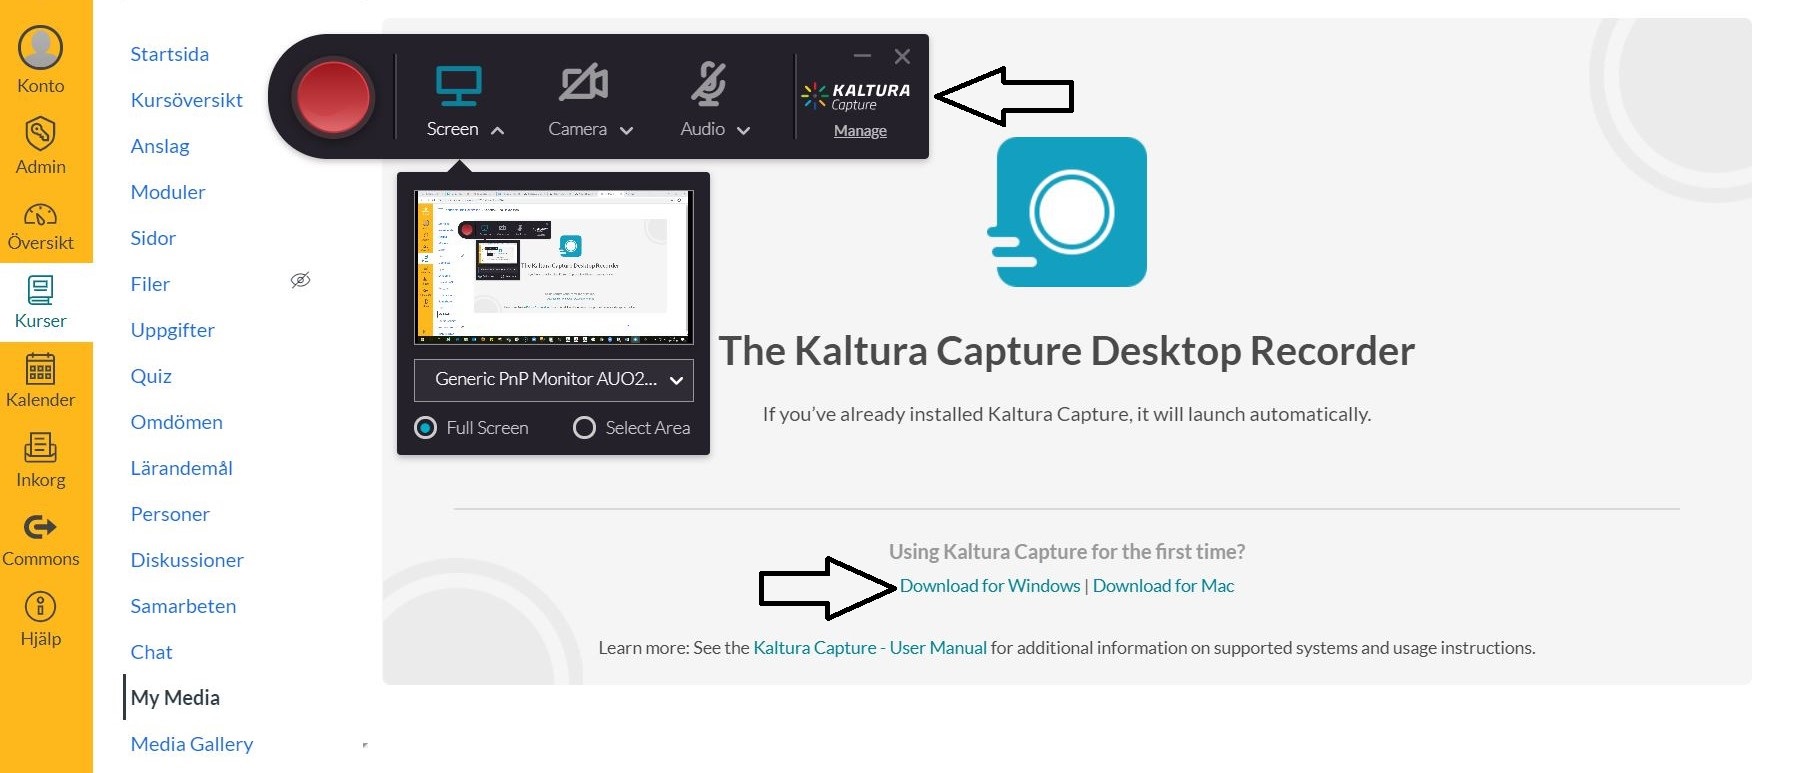
(The picture shows the tool Kaltura Capture which starts automatically if it is installed on your computer, as well as links for downloading the tool.)
Select which sources to record and change other settings
You choose which sources you want to record by clicking on the various symbols for screen, webcam and audio. The red button on the left starts recording.
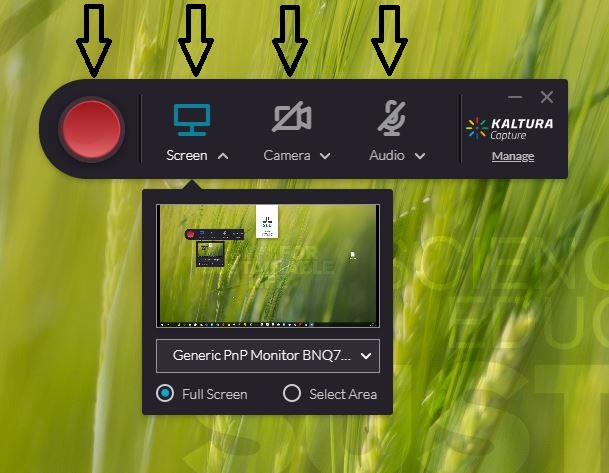
(The image shows clickable symbols for screen, webcam and audio to select sources, as well as the red button where you start recording. )
To change and save other settings such as screen and webcam recording quality, click the Manage link below the Kaltura Capture logo.
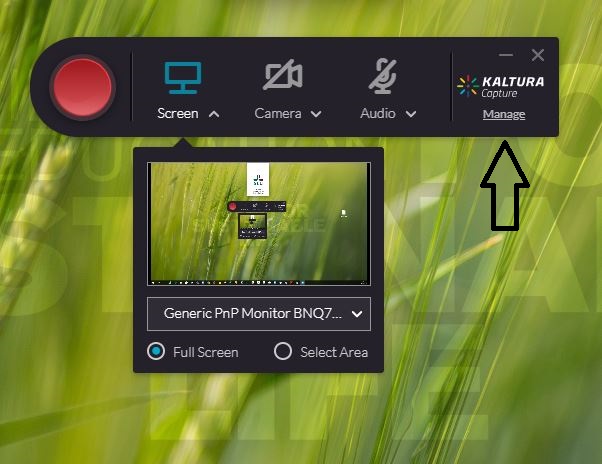
(The image shows how to open your Kaltura Capture Library via the Manage link. )
You will then come to the Kaltura Capture Library where you click on the symbol of a gear to open Settings. Choose settings and do not forget to save.
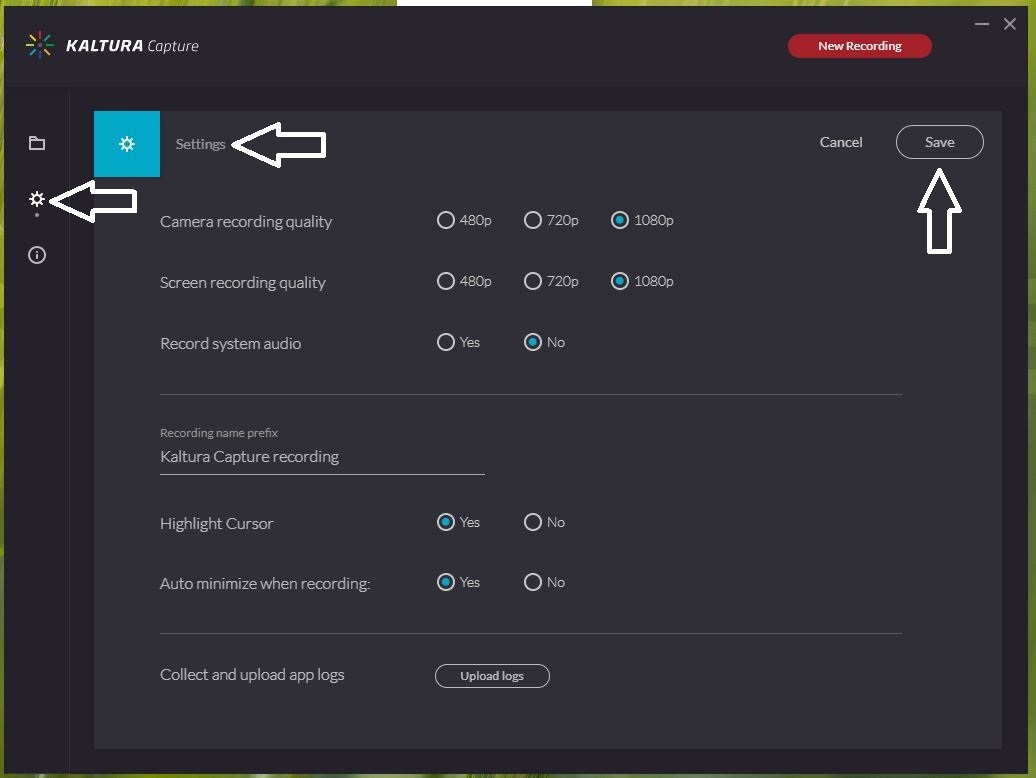
(The image shows a clickable symbol of a gear, when you click there you reach Settings in Kaltura Capture, where you change and save settings.)
Record with Kaltura Capture and upload to My Media
To start a recording, click the red button. When you want to finish, click on the gray button, if you want to pause, click on the red button with two vertical white lines.
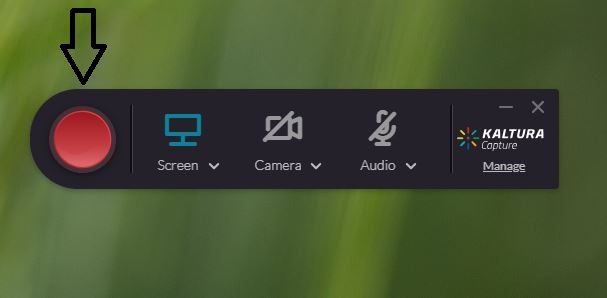
(The image shows the red button you click to start recording.)
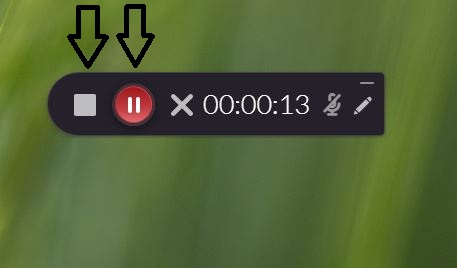
(The image shows the gray button you click to end the recording and the red button with two white bars to pause the recording.)
Once you have recorded, you can name the file, save and upload directly to My Media in Canvas or choose to save only to upload later. All your recordings that you have made with Kaltura Capture can be found in your Kaltura Capture Library after you have saved them.
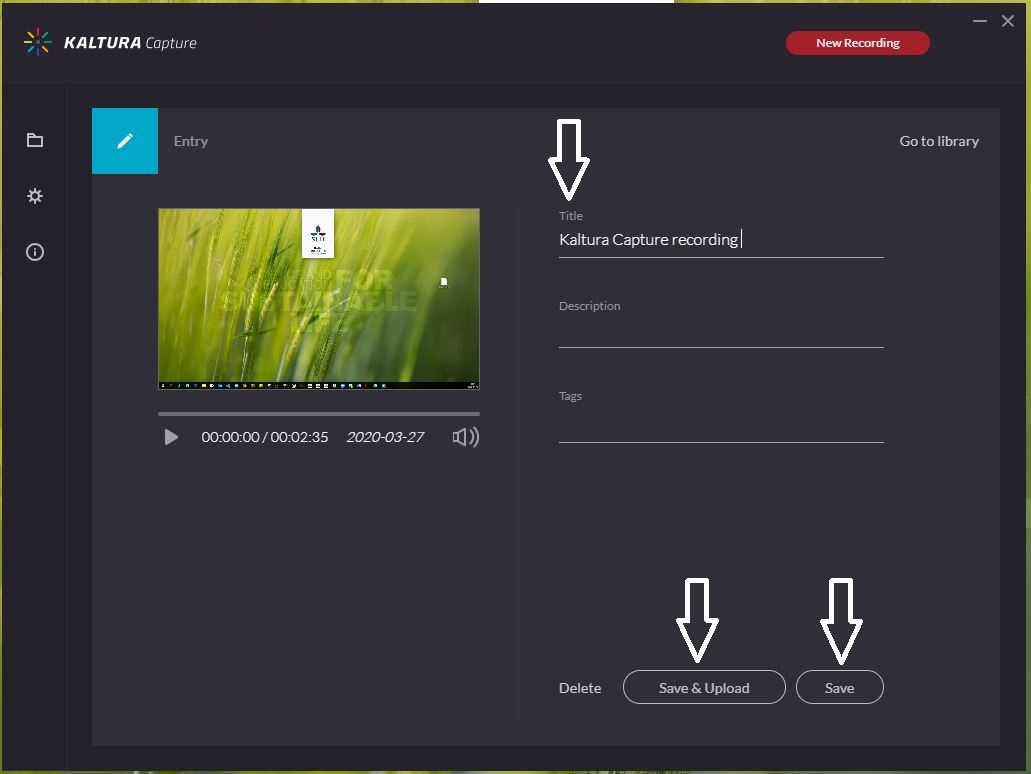
(The image shows how in the tool Kaltura Capture you name, save and upload or just save to upload later.)

(The picture shows the Kaltura Capture Library where all saved recordings are, as well as the Upload button for the recordings that have not been uploaded to My Media in Canvas.)
Under My Media in Canvas, the uploaded file is now visible. It may take some time before the file can be viewed even though you have received a message that it has been uploaded, this is because the conversion to different formats is still in progress.
Good to keep in mind when using the Kaltura Capture tool
- Best suited for use if you are uploading media to My Media in Canvas without editing in another tool.
- Possible to record several sources simultaneously such as screen, webcam and audio. The recording from your screen and webcam is saved as separate files on your computer. Both files contain the audio that was recorded. When uploading to My Media, a video is created with the option to choose which source should be in focus during playback.

Canvas Support
Servicedesk helps you with:
- Support.
- Sandbox (a test room where you can try the tools).
- Create users missing in Canvas and not in Idis.
You reach Servicedesk via extension 6600 or support@slu.se.
Contact
The Division of Learning and Digitalisation
For questions and comments about our educational systems
utb-system@slu.se.